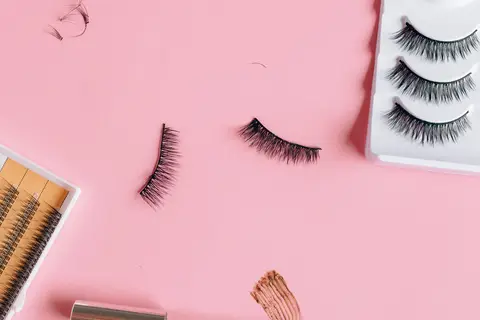
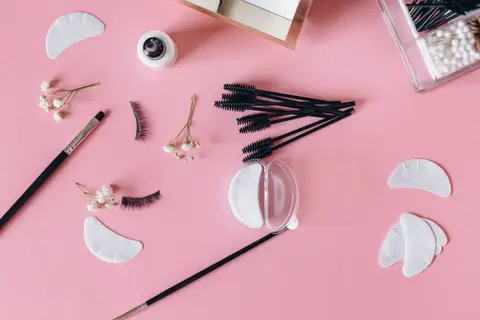
Cluster lashes (also called individual lashes) are applied in small sections rather than one full strip, giving more control over density and placement. This hub covers what to look for and links to our step-by-step application guide.
01
Editorial picks in Cluster Lashes
Cluster and individual lash sets chosen for beginner accessibility and customizable density.
As an Amazon Associate, OnlyEyelashes earns from qualifying purchases. Links open an Amazon search for the type of product described; we do not show prices or ratings. Details.
False lash formats at a glanceGeneral differences between the main at-home formats. Individual products vary.
Format
How it goes on
Best for
Watch out for
Strip lashes
One band placed along the whole lash line
First-timers and quick event looks
A stiff band can lift at the corners
Cluster lashes
Small sections placed one at a time
Custom density and placement
Needs patience and a steady hand
Magnetic lashes
Magnets (liner or sandwich pairs) instead of glue
Anyone who wants to skip lash glue
Magnets can be fiddly; check the maker's guidance
What are cluster lashes?
Cluster lashes, also sold as lash clusters, wisps or individual lashes, are small groups of lash fibres joined at the base. Instead of one band across the whole lash line, you place a handful of clusters one at a time along the underside of your own lashes, held by a bond and a seal. That gives you control: you choose how many, how long, and where.
They are an at-home product. They sit under your natural lashes and come off with a remover, which is what separates them from salon extensions, where a professional glues a single lash to each natural lash. This site covers the at-home kind only.
Cluster vs individual vs strip lashes
Cluster, individual and strip lashes comparedGeneral differences. Individual products vary.
Cluster sets list a length range in millimetres, a curl (often C or D) and a style such as natural, wispy or volume. For a first set, a short range is more forgiving because a placement mistake is harder to see. A longer range gives drama but needs a steadier hand.
Choosing length and curlStyling conventions you can adjust.
Goal
Length range
Curl to try
Density
Everyday, natural
About 8 to 12 mm
C
Lightweight wisps
A little more lift
About 10 to 14 mm
C or D
Medium
Special occasion
About 12 to 16 mm
D
Fuller
Straight or downward lashes
Any
D or CC
As you like
The lash map below shows a length and a count for each zone of the lash line, and the curl chart shows how each curl looks. See also C curl vs D curl.
How to apply cluster lashes
The short version: clean and dry your lash line, pick up a cluster with tweezers or an applicator, add bond to the base, place it under your natural lashes close to the lash line, hold for a few seconds, work from the outer corner inwards, and seal. The full steps, with a placement order and a mistakes table, are in how to apply cluster lashes. A first set takes patience; most people get faster with each application.
Lay the clusters out in order, shortest to longest.
Place the outer corner first, then work inwards.
Seal once all the pieces are in place.
How long they last, and how to take them off
Wear time depends on the bond, how close to the lash line each piece sits, your skin's oil and your routine. Packs often state a wear time; that is the maker's claim, so expect your own result to differ. See how long cluster lashes last.
Look for a short length range, lightweight wisps, a bond and seal made for clusters, and a kit that lists what is in the box. Our picks above come from the maker's own pages, and our beginner guide compares them in detail. Add a remover to your basket at the same time.
Cluster lashes and your eye shape
Clusters are a good match for different eye shapes because you decide where length goes. Hooded eyes often benefit from lift at the outer corner (see lashes for hooded eyes); almond eyes work with most placements; round eyes often suit a gentle taper. Use the eye shape finder to see your shape, and the cluster lash styles guide for ideas.
How many clusters do you need?
There is no fixed number. It depends on how full you want the look, how many natural lashes you have and how big each cluster is. A map gives a starting count for each zone of the lash line, and you can add or remove pieces to taste. As a rough guide, a set of 30 to 50 wisps covers several applications of a light look. Keep spare pieces for fixes; losing one cluster by lunchtime is normal, and a spare lets you patch the gap.
Placing clusters by zoneA starting point you can adjust. The lash map prints a plan for your eye shape.
Zone
Length
Role
Tip
Inner corner
Shortest
Soft start, comfortable
Leave a small gap from the tear duct
Inner middle
Short to medium
Builds density
Space evenly
Centre
Medium
Opens the eye
Check with your eyes open
Outer middle
Medium to long
Starts the lift
Increase length one size
Outer corner
Longest in your set
Creates the shape
Place first, then work inwards
Common problems and fixes
Cluster lash problems
Problem
Likely cause
Fix
Pieces fall off within hours
Bond too thick or thin; oil on the lid
Clean the lid, use a thin line, add the seal
Feels heavy or itchy
Length or density too much for that spot
Swap for a shorter, lighter piece
Looks bumpy or uneven
Pieces too far apart or off the lash line
Re-space and keep close to the line
Gaps show
Not enough pieces at the outer corner
Add one smaller piece
Hard to take off
Seal buildup
Soften with the matching remover; never pull
What to buy together
A good first order has four parts: a cluster set in a short range, a bond and seal made for clusters, an applicator or tweezers, and a remover. Some kits include some of these; check the listing and add what is missing. Our glue guide explains bonds, and the adhesives we could confirm on the maker's own page are listed there.
Clusters and your natural lashes
Because clusters sit under your lashes, the look depends on your own lashes: their length, direction and density. If your natural lashes point down, a D curl can lift them; if they already curve up, a C curl usually looks more natural. Compare them in the curl and length chart and see C curl vs D curl. Keep lengths within a couple of millimetres of your own for a natural result and go longer only at the outer corner.
Good to know
Clusters are temporary. They are not salon extensions and should never be glued onto your own lashes.
Sizes vary by maker. A 12 mm cluster from one brand may look different from another, so note what worked.
Practise once. Do a dry run with no bond before the day you need them.
Patch-test. Test the bond and remover on your inner arm first.
Safety
Patch-test any new glue, bond, remover or liner on your inner arm 24 to 48 hours before first use, keep adhesive out of your eye, and stop if you notice stinging, redness or swelling that does not settle. For pain or a change in vision, see an eye doctor. This site is editorial and not medical advice.
Pros and cons of cluster lashes
Clusters sit between a strip and a salon set. They reward patience with a result that looks like your own lashes, and they punish haste with gaps and bumps. Weigh both sides before you buy.
Cluster lashes: pros and consGeneral points; individual products and eyes vary.
Pros
Cons
You choose where length and fullness go
Takes longer than a strip, often 15 minutes or more at first
Lighter and more flexible than a band
Needs a bond and seal, and usually a remover, bought separately
One kit covers several looks, from soft to fuller
Pieces can fall off if the bond is thick, thin or applied to oily skin
Easy to repair: swap one piece, not the whole set
A steady hand and good light matter
Temporary, so you can stop any time
Wear claims on packs are the maker's claims, not a promise
Under your lashes or over the lash line?
Most at-home guides, and most of the sets we list, place clusters under your natural upper lashes, close to the lash line, so the piece is hidden by your own lashes. A few makers also list placement along the top of the lash line with a strip lash glue; one of the Ardell sets we name below says so on its page. Follow the placement and the adhesive your pack names, because the glue for one method is not made for the other.
Day before: patch-test the bond and remover on your inner arm, and do a dry run with no bond to learn the order.
Application day: clean the lash line, place the outer corner first, then work in. Seal once the last piece is in.
While wearing: keep oils and heavy cleansers away from the lash line, and do not rub your eyes.
Removal: soften the bond with the matching remover and ease each piece off. Never pull.
After: store spare clusters flat in their tray and note which lengths felt right for next time.
A bond that is wet when you place a piece slides; a bond that is tacky grips. Waiting a few seconds is the single habit that fixes most first-time failures.
Cluster lash guides
Everything on this site about clusters is listed below, from beginner picks to application, wear time and removal.
Individual lashes vs cluster lashes: how they differ in look, effort, wear and removal, with a comparison table and a simple way to choose for at-home use.
Updated 2026-10-31
Frequently asked questions
How long do the cluster lashes last?
It depends on the bond, how close to the lash line each piece sits, your skin's oil and your routine. A pack may state a wear time, which is the maker's claim. See how long cluster lashes last.
How much do cluster lashes cost?
Prices change, so we do not list them. They vary with pack size, wisp count and whether bond is included. Compare the number of wisps and the length range rather than the price alone, and remember a bond and a remover are usually bought separately.
Are lash clusters damaging to your lashes?
Clusters sit under your natural lashes and are meant to be temporary. Trouble usually comes from pulling them off, using the wrong adhesive or skipping a patch test. Remove them with a remover and stop if irritation continues. See how to remove false eyelashes.
Is cluster lashes better than lash extensions?
They are different products. Cluster lashes are an at-home, temporary set placed under your own lashes. Salon extensions are applied to individual natural lashes by a professional. This site covers the at-home kind; see DIY lash extensions.
What are the pros and cons of lash clusters?
The pros are control over where length goes, a light feel and easy repairs. The cons are the time it takes, a separate bond and remover, and a learning curve. The table above sets them side by side.
Will lash clusters ruin your real lashes?
Clusters sit under your lashes rather than on them, so the usual cause of trouble is pulling them off or using the wrong adhesive. Patch-test, use the matching remover and stop if your eyes are irritated.
Do lashes grow back after clusters?
Your natural lashes follow their own growth cycle whether or not you wear clusters, and a lash that falls out naturally is replaced. If you notice more loss than usual, stop wearing them and ask a doctor.
What are cluster lashes?
Small groups of lash fibres, joined at the base, that you place one at a time under your natural lashes with a bond and seal.